Your cart
There are no more items in your cart
Hello readers, welcome to the first episode of Let’s Get Crafty. Do you consider yourself a creative person? Or are you searching for a place that teaches you everything about needle felting?.
You can find thousands of craft blogs and videos across the internet. However, Felt and Yarn specialize in making felted products. We have been in this industry for more than 7 years. And we are ready to reveal all the secrets we have learned over the past years.
This series will be focused on providing you with in-depth tutorials. And unlike other tutorials, we will keep it short and easy. You won’t even realize how fast you can learn needle felting.
Now grab your crafty outfit on. And let us create your first own felt craft.
This week we are starting easy and slow. We have chosen to make felted hearts and stars. Why hearts and stars you may ask? They may look like a basic shape to you, don’t let it fool you. These basic shapes actually do a great job of teaching you multiple needle felting techniques. Go Here, For Everything You Need To Know About Needle Felting.
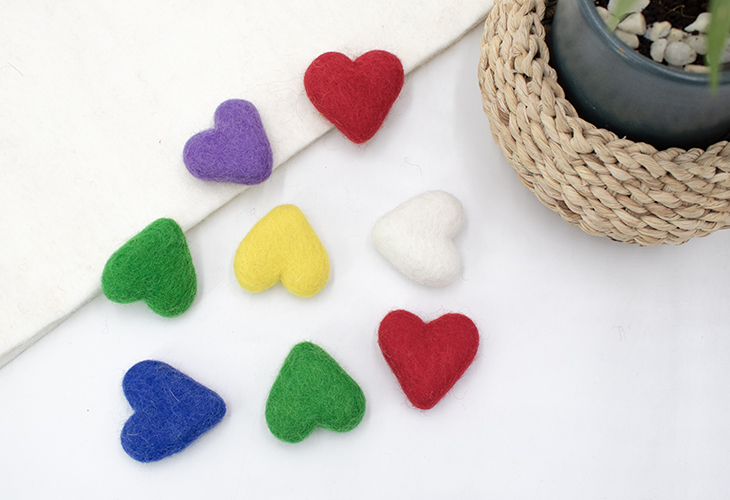
The heart shape is beloved by every gender and age. It even comes in the most used emoji. But most importantly, while making a felted heart, you will learn how you create rounded curves and triangular points.
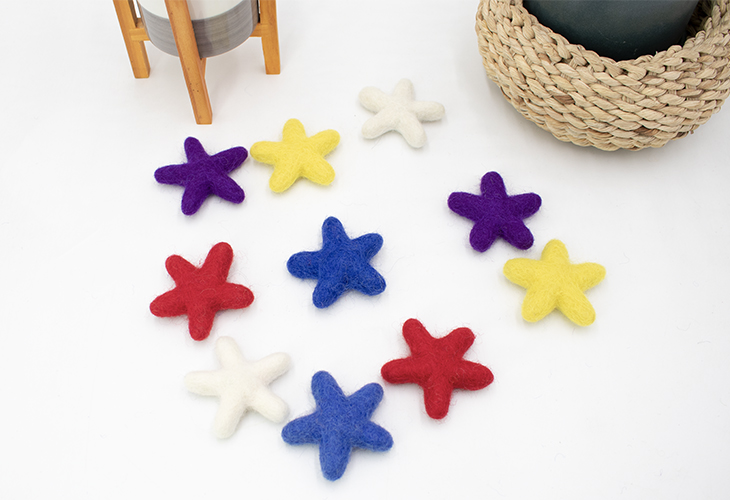
Stars are another great basic shape for beginners. Stars have many pointers and dips. While making felted stars, you will learn to create high low edges and how to create a symmetrical product.
To prove our point about how easy needle felting is, we first have our head in charge of needle felting. Then we have our novice, who just started learning needle felting. Both of them will show you how you can easily do it.
Needle Felting a Heart and a star
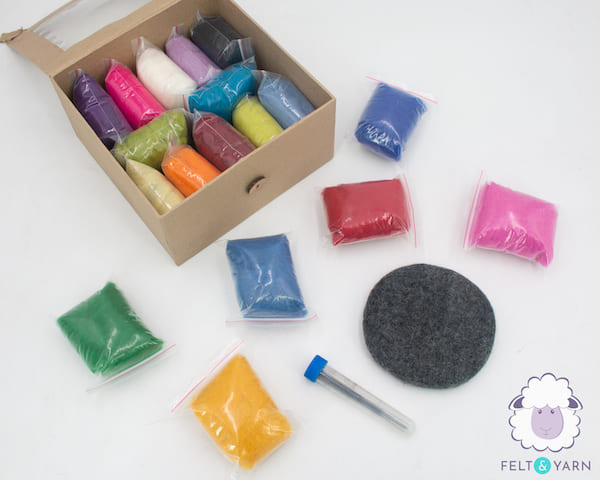
Things required for needle felting heart and star (size of 4/5 cm)
-
Felting Needle
-
Wool (choice of color)
-
Padding
-
Measuring tape
-
Finger guide (protector)
A felting needle has a sharp pointy top with a barbed end. When pierced through wool, the needle catches through scales of the wool fiber that push them together. You can easily get needle felting kits at an affordable rate.
For wool, you can use any kind of wool. Corriedale wool roving is great for a beginner as they are simple to work with. We have used red-colored wool and white wool for our craft.
For padding, you can use any thick foam or anything that is thick, dense, and soft to make your needling pad. You can use any type of measuring tape to measure the size.
A finger guide or finger protector is basically a glove for your finger (mostly thumb and index finger). It is used in the supporting hand that handles the wool while felting. It is highly recommended for beginners so as to prevent any mishap.

Now we have basic ideas and general things required for needle felting, it's time we start making our craft.
Let's start crafting
-
First and foremost, make sure you’ve set up everything necessary to start your work. Make sure you have enough wool, needle felting kit, needling pad, and ensure safety if you are just starting out or a beginner.
Tip: Use of a finger guide or finger protector is highly recommended if you are just starting out.
-
Collect wool according to assumption, start with less, and add gradually (as shown in the video). This is to ensure that the product won't be too large as you can add more wool if necessary but never take away the wool afterward.
-
Start piercing the wool with the needle along with giving them the heart-like shape. Give shape with the hand then start piercing.
Tip: Also, make sure to poke or pierce the wool vertically and never sideways to prevent the breaking of the needle.
-
Roll the wool and poke to bring shape as you want. For the heart, start with a piercing in the top part to make a ‘3’ or ‘M’ like shape. Pierce more in the middle part to give a distinct shape or make a defined line as shown in the video.
-
Then fold on the bottom part to make a ‘V’like shape to give a complete heart shape.
-
To needle felt a star, start with rolling the wool as shown in the video. Make sure to take more wool than you require.
-
Start needling to make a round shape at first.
-
Gradually start giving shape to the star by poking on the sides. It will take a certain time but the shape will eventually come by.
-
Measure the heart and star every time to bring an exact uniform shape. Feel the felt in the process of making to bring the shape and firmness.
-
Make sure the shape is perfect and after that add wool gradually. Add the wool to make it tight and firm and to bring it into an exact size.
-
Tightness brings quality to the product. If the product is left soft, it won't look perfect.
-
If the finishing product looks clean, firm, and tight, then the product is ready.
-
If the end product looks fuzzy with wool coming off the product, then make sure to stab a little more till the product looks firm and smooth.
Yay! You’ve finally made a red felt heart and a white felt star using the needle felt technique.
Conclusion
To summarize, needle felting is one of the easy felting methods to get started with. To make a heart and a star using needle felting you will need a felting needle, wool, measuring tape, base pad, and finger guide or finger protector.
Get started with taking wool and give it a shape and start piercing with a needle till everything comes into place. Measure continuously if you are making a distinct shape and size. Try to make it tight and firm to bring out the quality of the product.
Stay tuned for our upcoming blog series where we will show you how you can transform these basic hearts and stars to the next level. Get ready to blow your mind. Also, comment below if you have learned to make felt products by needle felting.