Your cart
There are no more items in your cart
Have you ever wondered how to make felt, how to felt wool, or how to do felting? Felting wool is an ancient yet versatile textile art that can be a creative escape, a meditative hobby, or even a profession.
Many people consider felting to be a form of art. For some, felting is an escape, a healing process; for others, it may be a profession. So, how did you discover felting?
What is felting? What is the process of felting?
Felt is a textile material made out of 100% natural sheep wool. This material is fabricated by matting, condensing, and pressing the wool together.
It is undeniably wonderful to witness the transformation of strands of wool into something beautiful and meaningful. Simply said, wool felting is the process of creating whatever your heart desires with a mold made of wool.
Felting wool is the oldest type of textile art. Felting wool can be a fascinating hobby for beginners. As a beginner, understanding the right way of felting can be perplexing, and most of the things you learn about are through trial and error. While felting is a work of style that gradually gets better with practice, it may be made simpler and easier by selecting the correct techniques and products for your project.
Let’s begin with different types of felting. It’s best to give all felting techniques a try to understand different forms and styles of felting. This way, you will have a better idea and understanding of the characteristics of wool and how to work with it. Furthermore, you will also be able to figure out which technique you are more comfortable with and enjoy.
How to Felt Wool by Hand: Basic Felting Techniques
Wet felting is a technique for transforming wool and other animal fibers into dense fabric known as felt. Warm, soapy water is applied to layers of wool positioned at 90-degree angles to one another, causing them to hook together into a single piece of cloth. Following the completion of the wet felting process, the felted object is finished by fulling or agitating the fibers against a rough surface such as a washboard. After drying, the felted cloth can be utilized to make accessories or clothes.
Dry Felting means that the individual strands are woven using particularly barbed needles, till they form a matted fabric. Dried felting is the process of decorating fabrics with dry strands or sheets of roving or felt, often made of wool. A felting needle is used to press the roving fibers into the fibers of the base fabric and adhere the design to the fabric.
What are the Different Types of Wet Felting Wool Techniques?
The most basic method of the wet felting wool technique is to lay wool in perpendicular layers, then wet the wool with water and soap. That is the most common method of wet felting, although there are several revolutionary wet felting techniques introduced over the years.

Basic Wet Felting
Things you need for wet felting: Wool, Bamboo mat/blind or bubble wrap, soapy water, spray bottle, and water
Wet felting process:
- Place down a bamboo blind or bubble wrap, whichever you have, on a flat surface.
- Place thin layers of wool. Carded wool is great wet felting wool. Small pieces facing the same direction on the surface.
- Add a second layer of wool, going in the opposite direction, perpendicular to the first layer of wool.
- Spray with soapy water and rub the wool gently.
- Put a thin layer of wool perpendicular to the second layer of wool.
- Continue adding soapy water and layers of wool until the desired thickness is reached and the fibers have adhered together.
- Using the bind or wrap, roll up the felt and work it back and forth until smooth.
- Fill the felt and rinse until the water is clear and no soap residue is left.
- Finally, let the wet felted product dry.
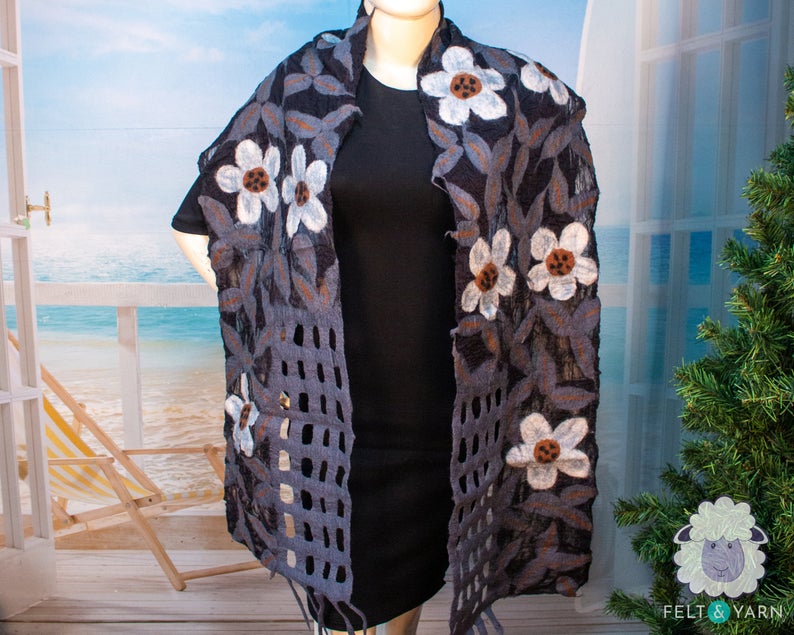
Nuno Felting
Nuno felting is a new revolutionary technique of wet felting. Nuno felting is a great way to create unique textures and patterns to create beautiful fiber art. Nuno felting is more abstract and creative. Nuno felting is mostly done while creating lightweight, flowy scarves, shawls, and curtains.
Things you need for Nuno felting: Roving wool, merino wool, bubble wrap, spray bottle, margin silk gauze, soapy water, and lukewarm water.
Nuno felting process:
- Place the silk gauze over the bubble wrap; the wrap should always be larger than the gauze.
- Start by placing overlapping wool roving around the edges of the template, then sprinkle some water to keep the wool in place.
- Fill the inside in a criss-cross way; this pattern allows the felt to be stretchy.
- Generously sprinkle the surface with lukewarm water.
- Add a second layer of wool with the color you want to be most dominant in this project.
- Place it in random and different directions for a unique and less uniform texture.
- Use the gauze over your work, and sprinkle water all over the surface.
- Then, start applying soap on the surface and gently rub it with your hands. Make sure you do not forget the edges. Be generous with your water, or else wool will not be felt.
- Take out the gauze. Now add loose strands of wool fibers of your choice. You could use merino wool for felting or viscose fiber.
- Play around by creating unique patterns and designs. What your heart desires.
- Place the gauze over the project again and repeat the felting techniques until the wool is agitated and fully felted.
- Take out the gauze and trim the edges for a clean finish.
- Keep in mind that the further fulling process will shrink up to 40% of the felt.
- Now, start fulling. You can fill your felt by throwing, bouncing, rolling, and lightly scrunching your product. Do that for a minimum of 15 minutes.
- Finally, rinse with warm water until the water is clear. Finish up with cold water.
- Press down in a towel to remove excess water and shape the felt and let it air dry.
Cobweb Felting
Nuno felting is the origin of cobweb felting. The technique is quite close to Nuno felting, and the stages are almost identical. The primary distinction between Nuno felting and cobweb felting is that cobweb felting has thick and thin surfaces all around the project. Create an uneven surface around the project by layering thick and thin layers.
This felting process is wonderful for experimenting with wool and generating varied textures and thicknesses to create a one-of-a-kind product each time. There is no right or wrong way to perform this felting. Cobweb felting allows you to embrace and appreciate your product's imperfections and inconsistencies.
Resist Felting
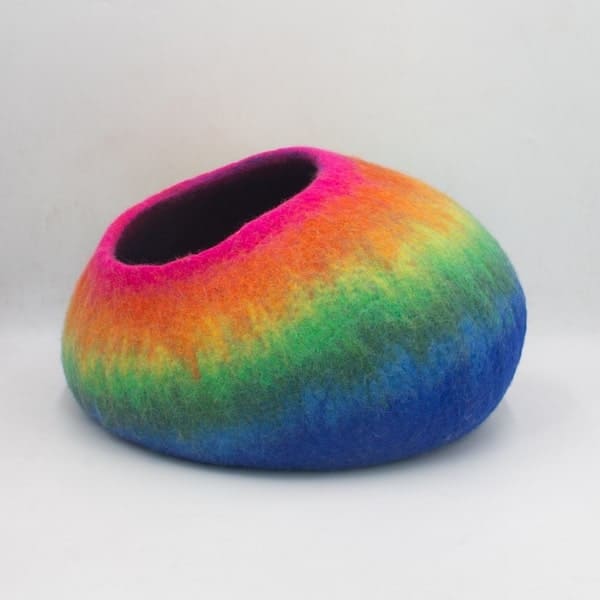
The Resist Felting Process employs some kind of barrier to prevent particular sections from bonding together. This is frequently a sheet of strong plastic. The Resist is sandwiched between layers of wool before being felted. When the Resist is removed, two layers of felt will be exposed. This type of wet felting wool can also be used for 3D felting. The resist felting is mainly used to create cat caves, felted baskets, wool felt shoes, felt bags, and bowls.
You're probably wondering, what's the barrier? How do I go about making one? You can make your barriers.
Cardboard Barriers are inexpensive and easily accessible. You can cut the cardboard to make any size or form you like. The cardboard barrier, on the other hand, can only be used once. This means that you'll have to make a new barrier for each wet felting project. Furthermore, the cardboard is quite thick and not particularly malleable. As a result, it may present obstacles while felting around it.

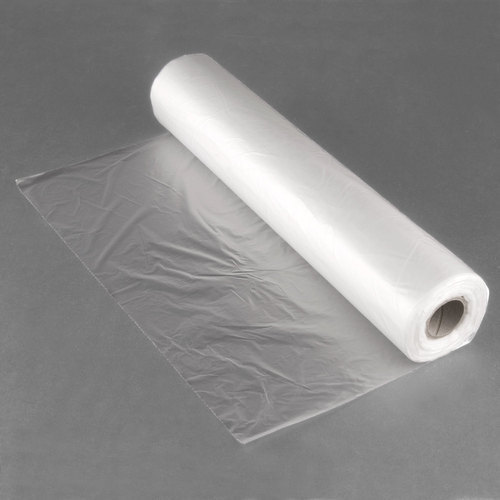
Thick plastic bags are also frequently recommended barriers for wet felting wool. They are both durable and malleable. The only complaint about utilizing plastic bags is that they are quite thin. During felting, you must pay close attention to the position of the plastic bag. If you don't have sensitive hands, plastic bags can be a bother.
I’m scared that my felting will shrink too small or didn’t shrink enough
It's no secret that after your felt is full (fully felted), your product will shrink by up to 40%. However, it is impossible to predict how much your goods will decrease. Different types of wool felt different. The shrinkage of the product is determined by the felting technique used as well as the type of wool or fibers used. So, what should I do?
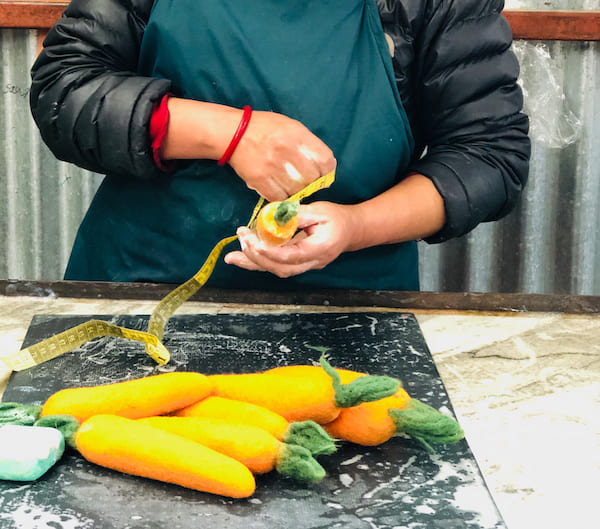
Creating a sample is a smart rule of thumb to practice before jumping on an actual project. Create a sample using the exact products and techniques you want to use for your actual project. Here is the simple rule you should follow for creating a sample.
- Use the same wool on both samples and the project. Each type of wool has its own characteristics. Every wool felts and shrinks differently.
- Have the same number of layers and equal thickness for both the sample and the project. The thickness of layers also influences shrinkage.
- Make sure you felt both the sample and project to the same degree in all directions; the more you felt, the more it shrinks.
You should be very meticulous about these rules. You will not be able to create an accurate sample and calculate shrinkage if you don’t follow these rules.
How can a sample assist me in calculating shrinkage? Here's how you can do it.
- Measure your sample after lightly felting it and before you start filling your sample.
- Then proceed fulling it until you reach the degree you want to feel it. Rinse your sample thoroughly, lay it down, and then measure it again.
- This will allow you to determine how much your felted product has shrunk, before and after fulling.
With this information, you can use the same formula for your bigger felting project. A simple calculation on how much percentage of your felted sample has shrunk. And while you're doing the actual project, always add the extra %. It’s as simple as that.
Common Mistakes in Felt Making & How to Avoid Them
- Not using enough water. Beginners in wet felting frequently underestimate how much water they require while felting. You must be quite generous. If you don't use enough water, the soap won't lather, and the wool won't be felted properly.
- Not correctly filling the felt. The majority of the time, beginners do not correctly fill the felt. Fulling is the process of ensuring that you truly felt your project. The most typical fulling technique is to roll, bounce, and drop the product on the surface while gently massaging it. There will be flyaways or loose fibers sticking out if your product is not correctly and sufficiently full. It will hurt the durability and integrity of your product. An incomplete filling will also result in irregular thickness, lumps, and a textured surface that is unsightly.
How to know when you have filled enough?
The wool will not stretch when you pull it. Felting a small item, such as a handkerchief, should take at least 15 minutes. And for larger projects, a minimum of 30-45 minutes is required.
- Using colored detergent or soap. If you’re wet felting with natural fibers with light colors, the color of your soap or detergent will dye your wool. You do not want that. You can use liquid, dish soap, or soap bars; the brand doesn't matter as long as it’s clear. However constant exposure to soap can dry out your hands, especially if you have sensitive skin. For that, some filters swear by olive oil soaps. Using soaps made with mineral oils or moisturizing soaps can help you with over-drying your skin.
Make sure you moisturize your hands every time after you are done with wet felting.
- Thinking that costly wool will lead to quality felting. To create quality felting, you don't need to buy costly wool. When practicing or beginning your felting journey, don't invest in expensive wools, which will give the same outcome as other cheaper yet better options.
A natural wool roving is ideal for novices to feel with. You don't have to spend a lot of money on expensive wool and kits. Wool with thin microns, which may be possible to be felted but is very expensive and complicated to feel with; commonly is used to make thread and textile. Whereas, 29-micron sheep wool and 19-micron Merino wool are the best for felting. Any wool l For felting, less than 19 microns is extremely thin and delicate which makes it unsuitable for felting.
Bubble Wrap or Bamboo Blinds?
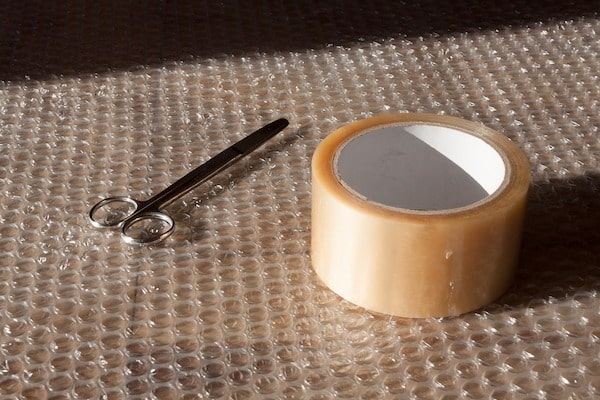
Bubble wrap is the most often used felting surface. They are used by both novices and professionals. As a beginner kit, bubble wrap is ideal. They are affordable and conveniently available. Bubble wraps are excellent for wet felting and are well-liked by the majority of filters all around. The only minor negative is that it can be a little slippery, especially when wet felting wool.
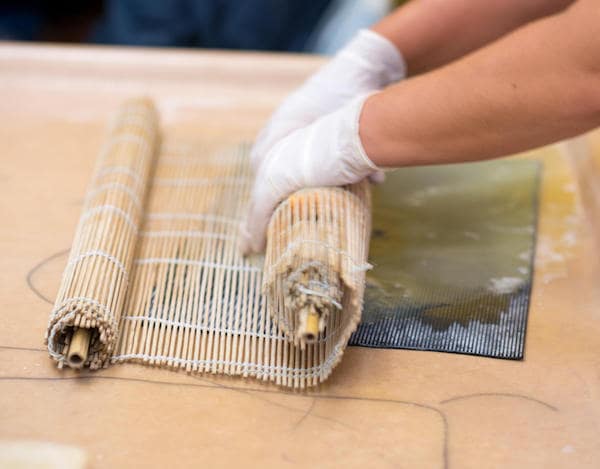
If needle felting wool is your profession, bamboo or matchstick blinds are ideal. They are reasonably priced and easily accessible. Bamboo blinds are very useful for big projects and are a more environmentally friendly alternative to plastic bubble wrap.
Finally, bubble wraps are fantastic for novices and are best suited to little felting tasks. Bamboo blinds are appropriate for large and small felting projects. While purchasing bamboo blinds or matchstick blinds, just ensure you don’t purchase dyed blinds, which can stain dyes to your wool.
Dry Felting: How to Felt Wool by Hand
Needle felting for beginners is the most prevalent dry felting technique. It does not require soap or water, but rather needles, wool, and a lot of wool stabbing.
Needle felting is ideal for adding fine details and precise features to your felt project. Needle felting can be done on a flat surface or to make 3D sculptures, which are all the rage these days. Needle felting is a great soothing hobby; the repetition of the same action over and over again helps relax the human brain. And the ultimate result is well worth the time you put into this project.
While there is no specific way to needle felt, there are methods to needle felt efficiently and make the whole process easier.
This felting technique necessitates the use of razor-sharp needles, which can be quite dangerous. So, not recommended for children without adult supervision at all times.
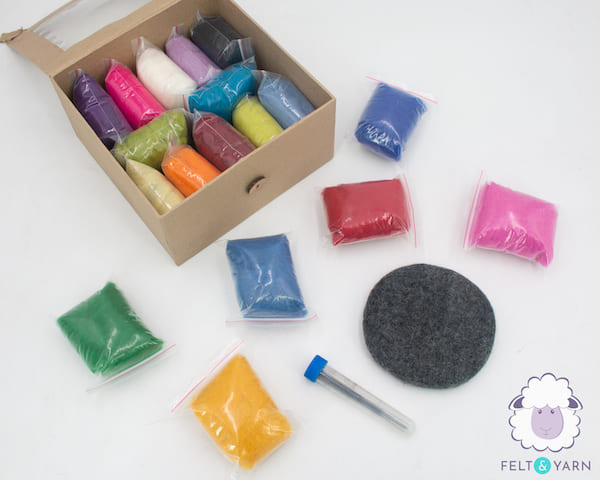
What Do I Need For Needle Felting?
Needle felting is relatively inexpensive. Most felt supplies bought for needle felting last you for a long time. It’s only the wool you have to replace and occasionally replace or upgrade your needles.
I’m not sure what wool I should use.
Unlike wet processes, the wool used for needle felting does not have to be a protein, sometimes known as animal fiber. However, animal fibers, such as sheep wool, may needle felt more easily since the filaments are not as slippery as silk or synthetic fibers.
Wool is available in a variety of forms, ranging from raw, unwashed wool to processed roving and yarn. Any of these fibers will suffice. Corriedale wool roving is the greatest bait for a beginner. They are simple to work with and felt quite nice
I don’t understand the difference between all the needles and do I need them all?
Felting needles are barbed needles of varying thicknesses. The sizes are determined by a number, with a higher number indicating a thinner and more pointed needle. The general guideline is that the thinner the needles, the more precise the details will come out. Thinner needles are therefore recommended for more detailed projects.
Individual needles are typically sold in sets of varying sizes. They are fairly affordable. Individual needles can be used to make flat or felt 3D crafts. However, using a single tiny needle for larger projects can be time-consuming. In that situation, you can use two needles simultaneously.
For creating a base, or larger surface, instead of holding multiple needles, which can be uncomfortable. You can purchase needle pens as a great alternative. These needle pens come with 3 needles. And for even larger or coarse wool, you can get tools that hold up to 5 needles.
When you frequently use the needles, they will get worn out and dull. Most of the time, while learning how to needle felt, you will break a needle or two. It is not uncommon so it’s always great to have spare needles with you.
Finger Guide
The finger guide is opted out by most filters. People who are experienced with needle felting have good control over their needles. They are aware and trained in pressure management and the direction of wool, so they barely poke themselves with these sharp needles. However, for beginners, finger guides are highly recommended. The poking of needles is not only painful but can lead to more serious events.
Finger guides mostly come in universal sizes. The material is mostly thick faux leather, suede, or thin metal. It’s totally about preferences on which one is better.
Padding
Padding is used as a surface to needle felt on and to protect your furniture while felting. There are many pads you can buy; however, you don’t need a premium and expensive pad for needle felting. A thick foam is more than enough to use as padding. Padding should be dense, thick, and soft.
Tips that every needle felters should know
- Always poke vertically and never sideways to prevent the breaking of your needles. During needle felting, if the needles are bending, that means you are poking it diagonally, which is the wrong way to needle felt.
- The more you stab the wool, the firmer and tighter you will feel. Your result should be firm; it should bounce back to its shape after squishing.
- Making a knot, or rolling your wool while felting to makes the base easier and faster.
- When you have fully felt, your result will be 30% smaller than what you originally started with.
- Always use less wool than you have anticipated. Add small amounts of wool at a time. Remember, you can always add more wool but never take away wool.
So, here is everything you possibly need to learn about different types of felting wool techniques and what you should and shouldn’t do. Comment down below if there were any steps you did thinking it were right, but it was wrong.
FAQs About Felting
Q1: What is the easiest felting technique for beginners?
A: Wet felting is generally easier for beginners because it allows you to see the wool gradually mat together. Needle felting takes more precision but is great for sculpting.
Q2: How long does it take to make felted wool?
A: Small projects can take 30 minutes to an hour, while larger pieces or complex needle-felted sculptures may take several hours.
Q3: Can I felt any type of wool?
A: Natural sheep wool works best because the fibers naturally interlock. Some blends may not felt properly.
Q4: Do I need special tools for felting?
A: Basic tools include wool roving, a barbed needle (for needle felting), bubble wrap or bamboo mats, and soapy water for wet felting.
Q5: Can felting be a business?
A: Absolutely! Many crafters sell felted accessories, home decor, or artwork online or at craft fairs.